
I’ve been creating gold foil prints for around 18 months and it has been a bit of a steep learning curve as I have found gold foil printing can be a bit of a black art! And I am sure there is yet more to learn as I still constantly get flawed prints… so I am on a mission to get them as perfect as possible!
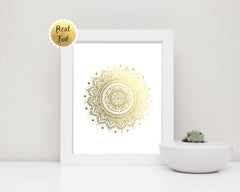
I sell some cool gold foil prints in my shop – check them out here!


So how does gold foil printing work?
Gold foil printing is done with the help of a laser printer, some gold foil transfer sheets and a laminator or a gold foiling machine. The image you want to foil has to be printed on a laser printer – not an inkjet. This is because laser printers print using toner which is effectively plastic. Inkjet printers print using inks. When the laser print gets passed through a foiling machine (which is hot inside) the toner heats up and melts slightly (because it’s plastic) and makes the foil from the transfer sheet stick to it - a bit like glue.
How to apply gold foil to your image:
- Print out your image on a laser printer
- Place the foil transfer sheet over your image
- Your foil transfer sheet should entirely cover your image. You can only do this once (believe me I’ve tried!!!) so make sure your foil covers your whole image – there is nothing worse than getting a perfect print with a tiny edge missing..
- Place your image and foil in the transfer folder (or if using a laminator then use a same sized piece of grease proof paper)
- Pass through your foiling machine.
- Once it has come out the other side wait a minute for it to cool down and then gently peel off the foil.
So is your print perfect? If not then keep reading…
Laminator or a specialist Gold foiling machine?
I went through 3 laminators (some of which were recommended for gold foiling!) before I ditched them all and bought my Heidi Swapp Minc. I must say there is a huge difference as the laminators were giving me patchy and inconsistent results. The minc is not fool proof but a massive improvement. To my mind it is the superior option because it has different foiling settings for different media types e.g. I use option 3 for heavyweight coated paper but there are other options for stickers, cardstock and chipboard(!) What I *think* this achieves is that it changes the amount of heat and pressure applied to the material being foiled. The minc also comes with a transfer folder which is ace for putting your prints through the machine. The alternative with a laminator is to use greaseproof paper or something similar. However, I have found that the greaseproof paper can crease in the laminator and create massive creases on your beautiful print which are then impossible to get out. And lastly laminators are less likely to take thicker items and can jam inside with your foil sandwich – that is how I broke my first laminator…
I went for the minc machine as from what I’d read this was the best one on the market (that wasn’t industrial size) however there are other machines available.
Would you like to try gold foil printing but lack the graphic design skills / software / clipart?
I've had a few of you contact me saying that you would like to try gold foil printing but don't have some of the technical skills required. So I have created a template you can use to make your own 'Dream Big Little One' print yourself (please note this item comprises the digital files you need to make the print - a background and a text file - and some instructions). Check it out here :

My Top Tips for Gold Foil Printing
Before placing your foil on your image blow on both of them to remove any dust particles – these can cause patches of black in your foil
.
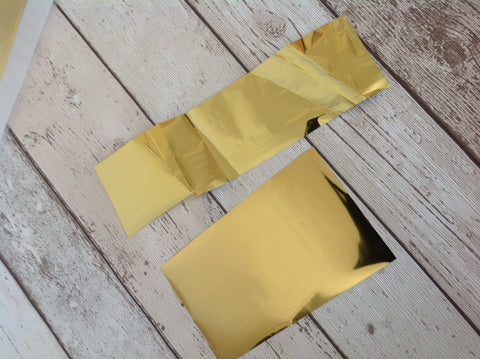
Ensure your foil piece is nice and smooth and undamaged – if you use scratched dirty foil then the result will be a patchy image. The foil at the top is creased and damage so will not produce a good print. The one in the bottom is smooth and clean.
Use good quality foil – I have tried a lower quality foil but I have found it to give poor results. I now use deco foil (see bottom of the blog for link)
Store your foil carefully and be careful when handling it. I store mine in a sealed zip bag.
Use one piece of foil for each toner area i.e. don’t overlap sheets when you don’t have a long enough sheet – you will end up with black lines on your print. 
Print in black ink ONLY. Don’t be tempted to print in coloured toner because for some reason foil does not adhere as well to coloured toner as it does to black.

You can use scraps of old foil that has already been through the foiling machine once but ensure you cut off any previous outlines – leaving these on will leave small black marks on your print. The piece on the right in this image is ok to use - the piece on the left will leave a little black circle on your print.

Try and print at a higher DPI than you need or print the image from a larger image i.e. if you are printing an 8x10” printout then create your image as a 16x20” and print it at an 8x10” size. I have found that this reduces the amount of flaws in the print.
Use good quality smooth paper suitable for a laser printer. The paper I use is in the tools section below. I have tried to use quality smooth archival matt paper but results are not consistent and I do find I get better results with the laser printer paper. See links below for the paper I use.
Make sure that your laser printer is printing at the best quality setting (not economy mode) and I have set mine to ‘Overprint black’;
After you have foiled give your print a minute to cool down
Don’t be tempted to put your print through the laminator again – it will in all likelihood destroy the foiling on the other parts of the print (it takes off that lovely shine and leaves the foiled areas with a duller look). I have even tried to use my minc on a setting of 3 first time and then put the print through on a setting of 1 but this is what happens (notice the marks on the tops of the mane)

If you fancy watching a video about exactly how I create my prints then here it is :
My Tools and Supplies
I am using affiliate links below - As an Amazon Associate I earn from qualifying purchases
If you are in the USA
- Laser Printer - As I am based in the UK the printers available are different but I have checked the reviews and specs of this printer and it is suitable for cardstock up to 61lbs (manual tray)
- My Laser Paper
- My Foiling Machine - This is the 12" version which is what I have
- My Foil
- My Transfer Folders
If you are in the UK
- My Laser Paper
- My Laser Printer - this has sadly been discontinued as I have an OKI C301dn :( I do need a new printer though as I think mine is coming to the end of it's life now. I think I may go for a brother mono laser printer next and I'm going to choose between these 3 :
- Brother 1212, Brother 2350, Brother 2370 when I've chosen I will update this blog post to let you know what I went for and how it is :)
- My Foiling Machine - Heidi Swapp Minc - I have the 12" version
- My foil
- My Transfer Folders
**Are you interested in creating prints? Why not check out my new website all about How To Sell Prints Online
**I also have a NEW How To Sell Prints Online Facebook Page
**And a NEW How To Sell Prints Online Facebook Group in which you can ask questions!
which I will post the latest offers/freebies/coupons etc as well as news